|
|
My Gimp Related Stuff
This page is to document my progress on a couple of gimp related things.
|
Notes From Making Plugins
Vertical Text Rollover Generator Plugin
Gimp patch that allows transparent transform previews
New Stretch Tool
My Gimp blog
What the Gimp Needs
(as of May 24, 2008)
Here are my own personal pet peeves about what mainline Gimp needs that it doesn't have:
- Image squishing using overall patches, rather than the more specific IWarp squishing
- IWarp filter as a tool (see Gimp's bugzilla report here).
- 3-point transform tool: click one point for an anchor, click next point for rotate and scale with the
first point remaining constant,
then a third point for shearing with points 1 and 2 constant. This is quite useful for fitting things inside
of other things, particularly for animation. A related bug report is bug 164828
about wanting a center for scaling. Also tangentially related are other transform tool related bugs:
bug 338888 about allowing the perspective tool to behave linearly,
and bug 138462 about having an Illustrator-like free transform tool.
- Batch processing of several images (not necessarily already loaded) should be much easier from the gui and also from the command line.
- Save as dialog should remember if the "advanced" options were open already. Also, when there is a preview about what will be saved, the
preview window should circulate to the top, and the quality slider should also be on top of that.
- Auto configure midi devices when Gimp starts up. Right now, I have to do a whole aconnect -l thing to get my
midi controller to send messages to the Gimp. It should be detected automatically.
- Allow another key modifier for shortcuts, meaning particularly the "windows" key often found between the control
and shift keys on many keyboards. In the key shortcuts preference window, you can select that key, on mine in comes out
as the "super", the shortcut says it will use it, but then it is ignored in the main image window.
Only shift, control, and alt are recognized there.
What the Gimp Now Has That I Somehow Helped Get In
- Transparent Transform Previews. My patch that works on Gimp 2.4.5 is below.
There is also another preview related bug 315051. You can control the
opacity of transform previews with keyboard shortcuts now!
What the Gimp Has That is Neat
- Cloning in perpspective. This is a really exciting tool that a Google Summer of Code student developed. Basically it allows
you to use a brick texture, say, and clone that onto a perspective grid, so that you can repave a walkway in a photo in a snap! How cool is that!?!
- Midi controllers can be used to change tools, control opacity sliders, or color components without popping up a window! Holy Cow!
Notes From Making Plugins
From the Gimp website:
The Gimp
Gimp C plug-in Howto
Gimp Script-fu Howto
Gimp Python-fu Howto
Making plugins for the Gimp is somewhat easy because how to do it and what commands you
can use are very well documented. You can program plugins in a variety of languages, including
Scheme (the original Gimp "native" scripting language), Python, Perl.
The available commands you can use are all documented from within Gimp itself through the
Procedural Database Browser.
If you make a python plugin, then make sure that the file it is in is executable!
Then put it in the ~/.gimp-(your version)/plug-ins directory (not the ~/.gimp-()/python
directory, not sure what that's for) and restart the gimp.
Transparent Transform Previews
Previously in the Gimp, when using the scale, rotate, shear, and perspective tools,
the transformed image was previewed always as an opaque image. This, while better than not
seeing the image at all, made it rather difficult to line up the transformed image on top
of other things.
Well, I finally hunkered down and programmed a patch that allows the preview to be a bit
transparent. You slide around a little slider saying how transparent, and the preview
obliges. As of March 2008, this feature has been included into the development version of the Gimp!
I have a couple of different patches for previous versions of the Gimp:
Works with Gimp 2.4.5, and svn on March 1, 2008: toms-transparentpreview-svn-2008-03-01.patch
Works with Gimp 2.3.10: toms-transparent.patch
To apply the patch, download the Gimp, unpack as necessary
and in a terminal, change to the main Gimp directory. Dowload the patch to that
directory and type:
  patch -p0 < toms-transparentpreview-svn-2008-03-01.patch
   -or-
  patch -p0 < toms-transparent.patch
Then compile and run! (please let me know if it doesn't work!)
New Stretch Tool
A work in progress...
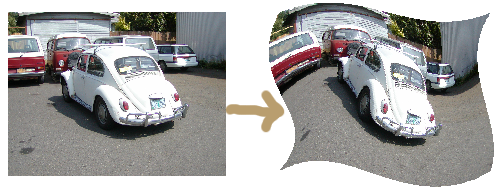
For a long time, I have desperately wanted some way to place images in the Gimp
that involves squishing the images around... see the
stretch tool in Laidout.
I am in the process of figuring out how to make this in the Gimp. What I said above about plugins
having a lot of howto documentation does NOT extend to the Gimp core, which is almost TOTALLY
undocumented, which makes my progress on this thing a little slow. Plus I'm giving myself only 5
hours a week to work on this, so don't expect much soon.
There is a Whirl and Pinch plugin distributed with the Gimp, but that only does twisting relative to
the center. There is also the IWarp distort filter, which is a lot of fun, but does not allow the same
sort of overall squishing. The Curve Bend filter only allows distortion vertically OR horizontally, but
not both, and it happens off the main window, which makes it extremely hard to use well.
For reference, here are some various stretching related links:
My write up about cubic bezier patches
Gtkmorph
Tom's Gimp Blog
Here is an RSS feed pertaining to my ongoing gimp tinkering.
Transparent previews now a part of the real Gimp!
March 7, 2008
So finally transparent previews have been accepted in the mainline Gimp that allows you to temporarily see
through sections of an image as you try to rotate, scale, shear or otherwise transform. This has long been one of my main
irritations whenever I use an unmodified Gimp to edit images.
Updated transparent transform preview patch for Gimp 2.4
March 1, 2008
I finally updated the transparent preview patch for recent Gimp. I use it now with Gimp 2.4.5, and it
works with the svn development version of the Gimp, for today anyway. Please let me know if you have
problems with it!
Patches here.
Umm.
September 21, 2007
So just in case you stumble upon this page and wonder, I've REALLLLLY put off working on this until
I work out more bugs and devise decent patch controls in Laidout first,
which hopefully won't take too much longer, whatever that means. At that point, I still intend to dig
back into the Gimp again, unless someone beats me to it (hint hint!)....
Midi Diversion
January 28, 2007
Yes I've been very slothful getting toward having a decent squish tool in the Gimp. In the meantime,
I do however have a couple
of notes on setting up a MIDI controller to control things in the GIMP. First, the instructions that come
with the GIMP say you first have to add this stuff to ~/.gimp/controllerrc:
  (GimpControllerInfo "MIDI"
    (enabled yes)
    (debug-events yes)
    (controller "ControllerMidi"
        (device "alsa")
        (channel -1))
    (mapping))
I'm using the ALSA driver and an Edirol PCR-M30 controller which has 30 keys and a bunch of dials and sliders.
The PCR-M30, by the way, can plug directly to the computer via USB, or be connected with MIDI cords. If
using USB, you don't even have to plug in in to the wall for power! Usually I have to spend a really long
time getting new hardware to work on my Debian machine, but this thing worked right off the bat. Continuing.
The instructions then say once you start the Gimp, you must connect the Gimp midi output port to the controller's
midi input port. There's probably an easy way to do this automatically whenever the Gimp starts and the
controller is plugged in, but I haven't figured it out yet. So every time I start the Gimp (from the command
line), I must first find which output and input ports exist with:
    > aconnect -lo
    > aconnect -li
Then I must make that connection, which goes something like:
> aconnect 72:1 128:0
where 72:1 is the input port for the controller and 128:0 is the output port for the Gimp. What a hassle!! Anyway,
when it's all connected, I've set it up (via the MIDI input controllers section of the preferences dialog) so the
keys change tools, and the knobs change things like layer opacity, and RGBA color component values. When you twiddle
a knob or key, text will come out on the terminal saying which controller or key it is, then just assign some action
to that thing and off you go.
Documentation again
December 5, 2006
So there I was trying my method below to get the gtk-doc generated object hierarchy of the gimp core in
the recent gimp cvs, and it DIDN'T WORK!!! GRRRRRRAAAWW! Documentation should not be this f'ing difficult!!!
Back to work....?
December 2, 2006
Well, progress has still been a little slow for me on the gimp front, what with now working a day job
full time, and various other cartooning deadlines to meet! I'll be making a new years resolution to
get my stretch tool made before.. um.. before.. May?
Back to work
August 21, 2006
After a brief coding hiatus to finish up Consumption Number 12,
I'm returning to my 5 hour a week Gimp tinkering. As another exercise before really getting serious
about my image squish tool, I'll be coding a 3 point transform tool, which
will work something like this: click one point for an anchor, click next point for rotate and scale with the
first point remaining constant, then a third point for shearing with points 1 and 2 constant. This is quite
useful for fitting things inside of other things, particularly for animation. See also the Gimp enhancement
request here. I also want to figure out how
to disable showing a layer during a transform preview (see this bug).
Someone submitted a patch for it, but I haven't been able to get it to work yet. Not sure if it plays nice with my
transparent preview patch.. Hopefully I'll get a fair amount of tinkering done before my next big deadline, which
is October 27 for the Stumptown Comics Fest.
Well now..
July 9, 2006
Ok then. I had made a call to gtk_set_sensitive() to the parent of a widget instead of the widget
itself, causing the whole container of the preview settings to blank out whenever starting the Gimp after
a tool had settings saved as Grid or Outline. It was nothing specifically to do with
the shear tool. So much for what I said before about this being the first Gtk code I've
written that "worked as intended"!!
Here is the updated patch.
Hell and damnation!!
July 7, 2006
I just noticed that my patch seems to work fine for the rotate, scale, and perspective
tools, but the shear tool grays out both the grid line density and my opacity slider, regardless
of whether the preview mode is Outline, Grid, Image, or Image+Grid. I cannot currently imagine why
the shear tool does this, but the others don't, since I did not touch the shear code. I only modified
the base class of all the transform tools, so the shear tool should have simply inherited the whole
shebang without difficulty. Well, back to the source!
When I can figure out just what in tarnation is a going on there, I'll be making patches that can be easily applied to
the Gimp versions 2.3.10 and 2.4 (whenever that gets released).
Near success for transparent transform preview..
July 4, 2006
So now I can have transparent previews. Fixed the problem when opacity was at 255. Also figured out how to make
the new preview opacity slider trigger an update of the screen. I had a missing gtk signal connect. Now, I should
figure out some way to optimize it a bit.
Here is a patch that does the deed for the cvs version of the Gimp.
To apply it, have the gimp source unpacked, and in the
top directory apply the patch. Basically:
  > cd gimp
  > patch -p0 < toms-gimp.patch
Then compile and run!
One step forward for a transparent transform preview..
June 25, 2006
I partially succeeded in implementing an opacity option for transform previews. You slide the opacity
bar in the tool options window to adjust the opacity. It is a little slower than the old way, and I imagine
some clever person can point out to me a more efficient way of doing it. If the opacity is 255, then the
extra code is ignored, and basically the old way is used. But, there's a bit of a problem when trying to
adjust a section of an image that you just map out with a selection. With opacity at 255, it is supposed to
use the old way, but almost none is drawn! That, and when the opacity slider is adjusted, the preview does
not automatically update. Hmmmm!!
Found the drawing code
June 22, 2006
At long last, I found the preview drawing code. It was not in app/tools where the tools that use
the transform preview live, but in app/display/gimpdisplayshell-preview.c.
A GimpDisplayShell is a subclass of a GtkWindow. It is basically the main
image window. A tool keeps track of which
GimpDisplayShell to draw on.Whenever the user drags a tool control around, the tool tells the display shell that the
affected area should be redrawn. Then when Gtk gets around to refreshing any windows that say they should
be refreshed, those affected areas are redrawn. Whether to draw the transform preview is stored in
a special flag within the GimpDisplayShell.
My next step is to screw up that rasterizing code in app/display/gimpdisplayshell-preview.c so that
the tool's new preview opacity option is taken into account. So that's only 700 more lines of largely undocumented
code to decipher! Hoo-Boy! After this excursion, I can begin to focus more specifically on the stretch tool..
Small progress..
June 9, 2006
I've succeeded in adding a "Preview Opacity" widget to the transform tool options dialog. This, by the way,
is the first Gtk code I've written that seems (so far) to work as intended. The next step
of course is to actually make the drawing code respond to that option! I imagine that code lies somewhere in
app/tools. The tool hierarchy is something like GObject::GimpObject::GimpTool, which is further divided into
GimpDrawingTool, GimpBucketFill, and GimpTextTool. The elusive Gimp Path Tool I finally realized was actually called
GimpVectorTool, a child of GimpDrawTool.
The stretch tool will perhaps be a bit of a combination between the transform tools and a
path tool, only the controls are for a grid of bezier patches, rather than bezier lines. One idea for the
future is to automatically figure out a decent patch grid to fill an arbitrary (closed) path with a patch gradient,
pattern, or image selection.
Food for thought..
May 31, 2006
A Google Summer of Code student is working on a
vanishing point tool for the Gimp
that will eventually allow cloning onto surfaces in perspective!
Someone on the
Gimp-dev mailing list
suggested even expanding this to involve cloning onto mesh defined surfaces, so you could clone onto
a spherical-looking thing, for instance. Wouldn't that be hot stuff for the stretch tool!
Getting ALL the available documentation..
May 29, 2006
Ok, so you can trip through the source with doxygen and something like this doxygen config file.
Copy that config file to the app directory and type doxygen. This will create
an enormous amount of html in app/html, containing a whole copy of the source code found in app
that allows you to track where things are defined somewhat easily.
Plus, I finally realized that you have to cd to devel-docs/app and type make
to build the gtk-doc style files for app related source. Since there are hardly any comments in app,
this will just dump out a whole lot of html in devel-docs/app/html that lists GObject hierarchies
and lets you click around the various classes.
BUT before you get to the make part of that, there has to be a Makefile in devel-docs. There's only a Makefile.am when
you grab the gimp from the cvs server. The answer to this lies with automake (or is it autoconf?). To go along to get
along, in the top gimp directory, you must type "./autogen.sh --enable-gtk-doc",
which most importantly makes a configure
script. autogen.sh also then calls the ./configure script,
and this will go through all the directories and create Makefiles. THEN you
can now go to the devel-docs/app directory and type make to build app's documentation, BUT NOT BEFORE building
the whole Gimp first!! Unless I'm missing something, that has to be done because something to do with gtk-doc seems to
require files ending in ".la", which aren't there without compiling the whole shebang. Those files seem to have something to
do with linking of libraries, but I have yet to find a good explanation of them [addendum: they are something to do
with libtool, which I don't understand, will have to read the stuff in 'info libtool'].
Gtk-doc conspires with
the autowhatever about when to go ahead and build documentation, so your simplest bet is to stick to the above method of extracting
documentation.
So to sum up how to get all the source docs there are to get:
 > export CVSROOT=':pserver:anonymous@anoncvs.gimp.org:/cvs/gnome'
 > cvs login
 > cvs -z3 checkout gimp
 > cd gimp
 > ./autogen.sh
 > ./configure --enable-gtk-doc
 > make
 > cd devel-docs/app
 > make
 > cd ../../app
 > (copy over the doxygen config file from above..)
 > doxygen
If you make changes to the source, say by adding documentation comments,
you must remove all the devel-docs/app/*stamp files, and then run "make" (in devel-docs/app) again.
To be continued...
So Whaddaya know?
May 22, 2006
The Gimp is composed of several pieces. There's the core, and then there are a whole
lot of other libraries that build on the core, like libgimp, which contains the
procedural database (PDB). The very well documented PDB, which can be browsed while running the Gimp,
makes it very easy to make plugins. You can search for various procedures to use
to rotate an image, fill an image, basically everything you can click to do, you can
also find a procedure to also do it.
Mapping out what's what in the terribly undocumented nether regions of the source can be
expedited using Doxygen and EXTRACT_ALL in the doxygen config file.
Gimp documentation is done with Gtkdoc, which is a bit of a pain to figure out at first.
I am still in the "at first" stage. I must also decipher the gnarly machinations of autoconf (or is it automake?)
to fully understand how to build all the available documentation in the first place.
It is my intention to document the source as I go along.
The stretch tool would live in app/tools, and it basically needs a whole new set of tool code
to work right. I'm thinking I will do it similarly to how I did it in Laidout/Laxkit, which is
to have a base PatchInterface thing, and separate ColorPatch and ImagePatch things that use
the Patch thing.
Home
-
Cartoons
-
Photography
-
Sculptures
-
Flat Art
-
Computer
-
Other
-
Stuff
Copyright 2008,
Tom J. Lechner,